Thursday, February 16, 2012

Fast French Onion Soup!! (Fast? I bet you just said, yeah right...)


4 tbs unsalted butter

dash of olive oil

5 large white onions, sliced thin (for a sweeter soup, use Vidalias or increase sugar to 2-3 tsp)

1 tsp sugar

dash of salt

ground pepper

8 cups broth (beef, chicken, or veggie stock will do!)

shredded or freshly grated cheese (most recipes call for Gruyere, but I love mozzarella or cheddar)

gluten free bread (if you’re not gluten free, sliced French bread is great for this)

2 cups dry white wine (I use Chardonnay, but a Pinot Grigio would be perfect)


Earlier this week, I heard someone on the radio say that he guaranteed that if he asked most people if they would prefer more time or more money that 9 out of 10 people would say more time. I’m not sure if I agree with that since I like to keep busy, but time is certainly precious. So, French onion soup? Who has time?

My sweetie likes to remind me that patience is a virtue. As if I didn’t know that? The problem is, of course, that I don’t have a lot of it. That isn’t to say, however, that good things don’t come to those who wait. Trust me. If you’re willing to put in some time, this French onion soup is going to blow your mind! That being said, traditional cooking of French onion soup takes hours…mine is the slightly speedy version. J

Combine the butter and olive oil in a large pot. Melt over medium heat. Add your onions, tossing with the butter to coat, cover, and cook for 20 minutes until soft. Stir occasionally. Then it’s time to turn up the heat (to medium-high). Allow your onions to cook for 5-10 minutes (again stirring occasionally) until they begin to brown. Then turn the heat back down to medium. Add the sugar and a dash of salt and continue cooking for another 10-15 minutes. By this point, my onions are starting to look a little papery. Yum!

Add your broth, wine, and salt and pepper to taste. Bring to a quick boil for two minutes, then reduce heat to a simmer and cook for an additional 10 minutes.

Ladle into soup ramekins (bowls), top with a slice of bread (gluten free should probably be toasted or broiled on one side first). Place the ramekins on a cookie sheet and place in the oven. Broil on low for 2-3 minutes until bread is toasted, then add cheese and broil for an additional 1-2 minutes until the cheese is bubbly or starts to brown.

Voila! French onion soup in about an hour!

Sunday, August 14, 2011

Seafood Risotto


I love Italian food…don’t you? The problem is, being gluten-free (and not by choice!), Italian is hard to get right. Pasta just isn’t pasta if it’s made from corn, rice, quinoa, etc. But risotto is one of those yummy dishes that is as Italian as they get…and it doesn’t have a bit of pasta in it. It’s creamy and rich and just melts in your mouth. Mmmm… Plus, the cool thing about risotto is that you can mix and match ingredients. Don’t want seafood? Use chicken, sausage, or even beef. Don’t like asparagus and bell peppers? Substitute broccoli and spinach. It’s such a versatile dish. The only thing you must have is onion, garlic, butter, olive oil, Arborio rice, and broth. Everything else is window dressing!

When I get stressed out, risotto is the perfect dish. I feel like I’m eating decadent food, but I tell myself it’s good for me since it’s full of vegetables (somewhat hidden for my sweetie’s comfort). What can I say? I’m a stress chef. Just the act of cooking a dish like this one calms me down and helps me find my center. In college, this was accomplished with a box of Kraft macaroni and cheese and a beer. Now that I can’t have either, I prefer something a little different. I know, I know. Some of you are probably thinking I’m weird, but to each her own, right? So on Friday, I was majorly stressing when I walked into the grocery store, and Publix had these beautiful sea scallops on sale…

Ingredients:

1 to 1 ½ bell peppers (for this one, I used ½ a red pepper, ½ a green pepper, and ½ an orange pepper), diced

medium onion, diced

4 tbsp garlic, minced, divided

1 cup diced portabella mushrooms

1 bunch asparagus, woody ends removed, cut into ½ inch pieces

1 cup Arborio rice

3 cups chicken or vegetable broth (I made mine with Better than Bullion…yum!)

4 tbsp unsalted butter, divided

2 tbsp olive oil

1 pound sea scallops

½ pound live mussels (Buy these on the day you are planning to cook! They are ALIVE and will die and be yucky if they can’t breath in your fridge.)

¼ cup white wine

Begin by prepping your veggies. Keep the asparagus separate as it won’t be added until the end of the cooking process. Sauté the peppers, onion, 2 tbsp mined garlic, and mushrooms in 2 tbsp of butter and the olive oil over medium-high heat for three to five minutes. Add the rice and sauté for two minutes. Then lower the heat to medium-low and sauté for an additional three minutes. Add one cup of broth, stir, and cover. Allow the broth to cook into the rice mixture, adding an additional cup of the broth when it has cooked into the rice mixture. Stir occasionally to ensure nothing sticks to the bottom of your pan. It generally takes about 20 to 25 minutes from start to finish to cook the rice mixture. When it’s done, the rice should be tender and creamy. (You can even substitute ½ cup of broth for a cream or half-and-half or add ½ a cup of Parmesan cheese to make it even creamier!) When you begin cooking your seafood, add the asparagus to your rice mixture so it will have time to steam in the pan but still be nice and crunchy. Yum!

To cook the scallops, put 2 tbsp butter and 2 tbsp garlic in a skillet. Melt your mixture over medium-high heat and add the scallops. Sauté for four to five minutes, turning them over halfway through. Do not be tempted to overcook! Overcooked scallops are rubbery. Remove the scallops from your pan and add the mussels and ¼ cup of white wine. Cover your pan so that your sauce mixture boils. Mussels open as they cook. Watch them…cook them for about 1 ½ to 2 minutes after they begin to open. Remove mussels from the pan and add sauce left in the pan to your rice mixture. Add scallops and mussels to your risotto pan. Done!

Serve in a bowl, topped with a little bit of Parmesan cheese. Watch as your family races for seconds! This recipe serves four if used as an entrée and up to eight if served as an appetizer.

Prep time: 10-15 minutes

Cook time: 25-30 minutes

Tuesday, July 12, 2011

Healthy veal scallopini? Yes, please!


Today, at the grocery store, I was waiting at the butcher counter when I glanced down and saw the most gorgeous 1/2 pound of veal cutlets that I've seen in a long time. Some people don't eat veal and lamb (just as some people don't eat meat at all) because of where it comes from...but I don't have any such qualms as long as the meat is certified tether and hormone free. To me, veal is one of those slightly sinful meats, almost always breaded and slathered in butter/cheese or combined with sausage or on top of a huge mound of pasta. As a matter of fact, veal is one meat I have studiously avoided since going gluten free simply because I was unable to picture it any other way. Today, however, I decided that I wanted it so I impulsively put it in my shopping cart (sorry Mom, I know veal is nowhere near my wedding diet).

When I got home, I started looking at veal recipes online and decided on veal scallopini...it's quick, simple, and it doesn't (necessarily) require pasta. So I took stock of what yummy veggies I could make into my sauce and found tomato, onions, and asparagus. I would imagine you could make any of your favorite yummy veggies make your sauce, but these are my personal favorites.

This recipe is for two:
1/2 pound veal cutlets
2 small onions
1 large tomato
1 bunch asparagus (approx 1 lb)
2 tablespoons minced garlic
salt
pepper
olive oil
flour (tonight I used King Arthur gluten free multi-purpose flour)
whatever wine you're drinking while you cook (mine was red - Petite Syrah)


Begin by tenderizing your veal. Some people will tell you that you can skip this step. I disagree wholeheartedly. I own a meat mallet for a reason (and it's not to chase my darling husband-to-be around our kitchen)....it's because certain meats are best thin and tender. Veal is one of those. Place your cutlets between two pieces of plastic wrap (I like this for ease of cleaning, but wax paper works great too!) and pound away till your veal is (uniformly) half as thick as it was when you started. The thinner it is, the more tender it will be. Don't go over too overboard though...you want something left to cook! Slice your veal into 3-4 inch strips.

Now, prepare your vegetables. Cut the tomato into pieces that are about the size of a quarter. Sliver your onions, and cut your asparagus into 1 1/2 to 2 inch pieces (discard the woody end of the stems). Mince your garlic (or get it out of that insanely large jar of minced garlic that has permanent residence in your fridge like mine).

Pour just enough olive oil in your skillet to barely cover the bottom of the pan. Heat the oil olive to medium-high. Just like frying anything, the oil is ready when you put a tiny pinch of flour in and it sizzles rather than sinking. Salt and pepper your veal and dredge it through your flour (yay, gluten free flour!). Shake off any excess flour and place them in the hot oil. Cook approximately 1 minute on each side. Don't overcook! Veal gets tougher the longer you cook it. When the flour has browned on each side, remove the veal from the oil and place it on a plate lined with an absorbent cloth.


Back to the skillet! Add your garlic, onions, and asparagus, and sauté them for two minutes. Add your tomatoes, a healthy splash of wine, and some salt and pepper. Then simmer your sauce till your veggies are as crunchy as you like them. Me? I'm a crunch-lover so the sauce was on for less than six minutes...


To plate, spoon a nice-size portion of the sauce directly onto the plate, arrange your veal on top, then top with a little more sauce. I served this with crunchy green beans and cottage cheese (which previously-mentioned fiance said made it taste "really Italian"...haha!).

Thursday, July 7, 2011

Are Brussell sprouts...


...the bane of your existence? When you were little, did you try to feed them to your dog? When you see them, can you immediately taste bitter mushiness in your mouth? If you answered yes to any or all of those questions, then you are reading the right post. The trick with Brussell sprouts is to minimize the bitter (caused by plant chemicals known as glucosinolates) and maximize the yummy. My mama has always said I have never been a picky eater (but then, she never tried to feed me Brussell sprouts either), but I was never a big fan of these "baby cabbages" until a few years ago.

I will credit my friend Aubrey with this yummy recipe, and I will admit to being skeptical when I heard how simple the recipe was...up until she made me these crunchy yummy wonders, I liked to undercook the sprouts and pair them with a stronger taste (like Ranch dressing or feta cheese). Now my fiance and I eat these about three or four times a month.

Take a minute to look at your sprouts...they should be bright to dark green with little to no yellowing of the leaves and no obvious bug damage. Each of these little beauties looks like a little cabbage with leafy head and hard stalky end. If you have the chance to buy a whole stalk of sprouts, do it! It's always cool to see where your food begins...(it's also okay to cheat and buy the sprouts in the nice recyclable plastic container that they come in at most grocery stores). Whatever you do though, these sprouts must be fresh, not frozen.

Begin by cutting the end off of the sprouts (just like cutting the hard end off a cabbage). Cut enough that you're taking off a good bit of the hard white end (that's where most of the bitter is) but not too much. When you cut the sprout in half, an outer leaf or two should come off easily, leaving the tightly packed inner leaves in place. When you have taken off the end and cut each sprout in half, remove the loose leaves and place your sprouts in a large bowl. Toss them with olive oil and allow them to sit for five to ten minutes to absorb a little of the oil.

Spread your sprouts on a cookie sheet (the olive oil on the sprouts will keep them from sticking). Don't pour the left over oil onto the sheet (you can use it to make salad dressing for your other healthy side, right?). Place the cookie sheet in a 400 degree oven for 15-20 minutes. Turn the sprouts over after about 10 minutes (they should be starting to brown nicely on the side that was touching the pan). When the sprouts are nicely browned (not crispy) on each side, remove them from the oven and sprinkle them with a little bit of seasoned salt (I like Lowry's because it's gluten-free).

At this point you can either be good and put them on your plate with your dinner....or you can be like me and pop a few in your mouth right away. These are nutty, a little crunchy, and delicious! Nothing to be bitter about at all!

Friday, April 15, 2011

La zuppa toscana


I love soup. I eat it in the fall. I eat it in the winter. I eat it in the spring. I love soup so much, I even eat it in the summer…though chilled soups are much better at times like that. The weather is a little dreary today, and even though it’s April, it made me think of soup. So here’s a look at one of my favorites, stolen right off the menu from Olive Garden: la zuppa toscana.

So, I’ve been in love with this soup for as long as I can remember…creamy stock, crumbly potatoes, savory sausage and onions, and crispy kale. The problem I keep running into though is that a) it’s not listed on the gluten free menu at Olive Garden and b) they stopped putting the large amounts of kale in the soup that made me love it in the first place.

This soup is simple and homey and so fast to make…and it makes me want to say “buon giorno” or “ciao bella” (or something equally Italian) while I stand in front of my stove.

You will need:

1 sleeve of Jimmy Dean (or brand of your choice) sage sausage

3 large Russet potatoes

1 large white or yellow onion

2-3 Tbps. minced garlic (3-4 cloves?)

kosher salt

black pepper

bunch of kale (though how much you use is up to you, haha!)

half-and-half (I use fat-free Lake o’Lakes)

chicken bullion

Cut your potatoes into ½ to ¾ inch pieces. Boil them in the chicken stock you make from the bollion (5 cubes to 10 cups of water...or 3-4 tsp of Better Than Bullion Chicken which is so definitely better than bullion since it's gluten-free and delicious...it comes in a highly viscous form in a jar at your grocery store) in a large soup pot until mostly tender.

While waiting for your potatoes, brown the sausage with the onions and garlic. I usually use less garlic if the onion smells particularly strong, but that’s a judgment call on how much you love onions and garlic. I personally could probably fend off vampires with my garlic consumption each week, but I know that some people don’t love it as much as I do. Make sure to drain the sausage as (I love Jimmy Dean anyway) it’s pretty greasy.

When the potatoes are mostly tender, add the sausage/onion/garlic concoction to the pot. Stir and simmer for two or three minutes. Add enough half-and-half to make it creamy but not terribly thick (usually up to a full cup…I eye-ball it since too much makes it pretty heavy). Here’s where you want to start tasting this heaven-sent yumminess (if you haven’t already). Salt and pepper to taste (I don't usually add a lot of salt because the bullion is pretty darn salty).

Now, let’s talk about the kale…I like mine pretty crunchy, and if you don’t, now is the time to start ripping the kale into half-dollar sized pieces and throwing it in the pot. If you are a crunch lover like me (everything else in the soup is soft), put your ripped kale in the bottom of each person’s soup bowl just prior to serving. Allowing the hot soup to soften the kale for a minute or two gives just the crunch and texture that I’m looking for.

This soup refrigerates well for up to five days. The cream in the half-and-half will separate as will the fat from the sausage, but heating it up makes it all blend together again. The soup also freezes well for up to four months. It’s great to pull out to thaw one morning when the temperature isn’t going to be quite as warm as you wanted (reheat on the stove or in the microwave).


I guess all that’s left to say is BUON APPETITO!

Friday, March 25, 2011

Gluten free Maryland crab cakes


Mmmm...Maryland crab cakes

2 lb crab meat (pick out any shells)
3 stalks celery, minced
1/2 bell pepper (I use orange), minced
1/2 medium onion, minced
2 eggs
1/2 cup gluten free mayonnaise (regular Duke's works best!)
2/3 cup gluten free bread crumbs (you can use regular if you're a regular kind of guy or gal)
1/2 lemon, juiced
2 tsp dry mustard
2 tsp Worcestershire sauce
4 shakes of garlic powder
7-8 dashes dried basil
1 tsp kosher salt

Mix all ingredients together in a large bowl. If you aren't squeamish, use your hands to really work the ingredients together (like hamburgers!). Form the mixture into patties. I like big ones, but small ones would be yummy too. The cooking instructions are for quarter pound patties, so just make sure you watch so that smaller ones don't overcook.

Bake at 375 degrees. Flip after 15 minutes then bake another 10-15 minutes till firm. Use caution when flipping...gluten bread crumbs don't have the same sticking power as regular bread crumbs! I used a pancake spatula and a baking silicon spatula...only broke one.

Makes 8 quarter-pound-ish patties. These reheat well. Serve with remoulade sauce (see below) or your favorite tartar sauce.

To make the remoulade sauce (my personal recipe, so sorry if it's less than authentic!):

1/2 cup mayonnaise
lemon or lime juice
minced garlic
sugar
parsley
basil
horseradish or Tabasco sauce if you want to make it spicy

Add citrus juice to the mayonnaise and whisk till smooth. Add 2 tablespoons of minced garlic, 1 tablespoon each of parsley and basil, and add sugar to taste. If you want a spicier sauce, add fresh grated horseradish or Tabasco sauce. Whisk.

Hey y'all (Corey)

It has been such a long time since we posted anything...and I could make excuses, but I won't. We're busy ladies, and sometimes you make things a priority even if it's not what you want to be doing. But, hey, we're back, and we'll be posting lots of yummy stuff.

Laura and I found out right after our last post that we have Celiac disease. Without getting too technical, it basically means that we can't eat anything with gluten in it. What's been interesting for me, at least, has been finding out just how well-versed the restaurant and grocery world already is about gluten. Except for a few slip-ups, both Laura and I have been pretty good at staying away from anything with a derivative of wheat, barley, or rye. So now our posts will mostly be gluten-free...you may occasionally hear from Mom on a something she just couldn't help but share, but even those can usually be made A-ok for us with a few jiggles and substitutions.

Let's eat!

Thursday, August 5, 2010

Black & blue salad


I don't eat red meat often, but every so often I get a craving for a yummy medium-rare steak. With this salad, you can feed about four to six people with one 1 lb. New York strip as the steak is pan-seared and sliced thin.

When I was in college, I worked at a restaurant called O'Charley's. If there's not one near you, it's kind of like an Applebee's or Ruby Tuesday's. Among many things on the menu during that time was a steak and bleu cheese salad that I would occasionally order at the end of my shift. As most foodies who cook will tell you, after that first bite, you start to deconstruct the dish to see if you can make it at home. I don't know if this salad is still available at O'Charley's as three years of working there kind of sent me in another culinary direction, but I think that most similarities end with the lettuce, steak, and cheese.

+/- 1 lb. New York strip (filet mignon or sirloin can also be substituted)
balsamic vinegar
extra virgin olive oil
minced garlic
brown sugar
rosemary
thyme
parsley
spicy brown mustard
kosher salt
black pepper
several romaine lettuce hearts (or lettuce of your choice)
shelled roasted pistachios
strawberries
purple, yellow, or white onion
alfalfa sprouts (radish or broccoli sprouts would be nice too)

Begin by preparing the marinade for your steak: 1/4 cup of balsamic vinegar and 1/4 cup of olive oil, 3 tablespoons brown sugar, 3 tablespoons of minced garlic, and 1 teaspoon of thyme. Poke your steak vigorously with a fork many times front and back...not only will the marinade will seep into the little holes, it also functions to tenderize your steak without using any meat tenderizer. Place fork-tenderized steak into marinade and refrigerate four to six hours, turning every two to three hours.


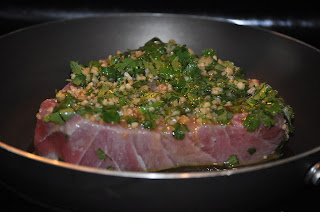
When the marination time is complete, allow the steak to rest in its marinade at room temperature for about 15 minutes. Heat a non-stick skillet to medium-high. When the pan is hot (not before), place the steak into the skillet. Sear on both sides about four to five minutes, spooning marinade onto the steak every so often. While the steak is finishing, add one whole slivered onion to the pan and caramelize the onions in the pan leavings. Remove the steak from heat and allow to rest two to three minutes then slice as thin as possible. (If you don't like medium-rare, please cook it longer...just remember that the longer you cook it, the less tender it is.)


To create the salad base, for each person I take a whole romaine heart and just chop it cross-wise all the way down to create 1 inch thick ribbons. I usually add a couple of length-wise chops too to bring the lettuce ribbons down closer to bite-size. Plate your lettuce and add about 1/8 to 1/4 cup of pistachios to each plate. Garnish with sliced strawberries, caramelized onions, and sprouts. Add mustard salad-dressing, then top with steak slices and bleu cheese crumbles.

To make the salad dressing, combine 2 tablespoons spicy brown mustard with 1/2 cup balsamic vinegar. Add 1 tablespoon each parsley, rosemary and thyme (if only there were sage, I could sing!), 1/2 teaspoon salt, and 1 teaspoon pepper. Add 1/4 cup olive oil if desired (I didn't, but it would be yummy). Mix well.

Thursday, July 22, 2010

Turkey kilbasa and tortellini in a creamy pesto sauce (Corey)

I have often been accused of using as many dishes as possible when I cook. Since this has been brought to my attention more than once, I have made a concerted effort to use less cookware..though I am super guilty of forgetting where I put the spoon and getting another one out of the drawer! With that in mind, be proud that this only makes three things dirty: one pot, one colander, and one cutting board. Cutlery (despite what others may tell you) doesn’t count.


1 package smoked turkey kilbasa sausage, sliced into 1/4 inch slices

1 package spinach and ricotta tortellini

baby portobello mushrooms, sliced

1 bunch asparagus, woody ends removed, remainder cut into 1 1/2 inch segments

1 small purple onion, diced

3 stalks green onion, chopped

1/2 yellow bell pepper, julienned

Alfredo sauce (You can make your own, but to keep it a one-pot meal, I usually use Bertolli.)

basil pesto (Mom’s recipe is great! Store-bought is fine too.)

extra virgin olive oil

kosher salt


Bring 4 quarts of water to a boil. Add 1 tablespoon each of extra virgin olive oil and kosher salt to the water before adding the tortellini. Boil 8-12 minutes until the pasta is tender. Be careful not to overcook as this pasta will fall apart and lose its stuffing. When the pasta is cooked to your taste, drain using a colander. Don’t return the pasta to the pot yet.


Return the now-empty pasta pot to the stove. On medium-high heat, add the turket kilbasa and cook for two to three minutes, stirring frequently. Reduce the burner heat to medium. Add the vegetables to the pot and sauté until al dente. Add half the jar of Alfredo sauce (it’s probably still in the fridge from when you made the pizza) and two heaping tablespoons of pesto. Stir well to distribute sausage and vegetables in the creamy pesto sauce. Fold in tortellini. Plate your yummy pasta creation and garnish with some of the chopped green onions.


On the night pictured, I served this with a simple summer salad (mixed baby greens, grape tomatoes, slivered almonds, and balsamic vinegar) and watermelon wedges.


For all of my vegetarians out there, it's just as yummy without the sausage.

Wednesday, July 21, 2010

Mexican Seared Tuna Salad (Corey)


Tonight’s dinner was super delicious and easy to make. It all started at the seafood counter in Bloom as I contemplated various fish. Did you know that swai is Vietnamese catfish? I sure didn’t...and since I don’t know how to make catfish without frying it, I settled instead on a lovely purplish-red tuna steak. One 8 ounce steak was enough for dinner for two, and thus, this recipe is for two people. Multiply your recipe for as many people as you’re serving, and you’ll be fine!


8 oz tuna steak

extra virgin olive oil

minced garlic

juice from one lime

minced garlic

2 romaine hearts

1 can black beans

ketchup

cumin

garlic powder

cucumber

1-2 slicing tomatoes

grape tomatoes (optional)

onion (white, yellow, or purple)

jalapeño

1 bunch cilantro

alfalfa sprouts

your favorite salsa

your favorite Ranch dressing


Begin with the marinade for the fish. Tonight I used tuna. Any other firm fish will also do...swordfish, salmon, etc. For one tuna steak, I used 1/4 cup of extra virgin olive oil, the juice from 1 lime, 1 tablespoon of minced garlic, and 1/4 bunch of cilantro, chopped. After mixing all of this together in a non-metal bowl, I dunked my fish in and covered it with the marinade for 30 minutes, turning it after the first 15 minutes.


I then cooked it in a non-stick skillet on medium-high heat for six minutes on each side to sear the outside of the steak. After twelve minutes, the outside was nice and browned while the inside was still a beautiful medium-rare pink.


While the fish cooked, I built my salad plates.


As these were main course salads, I used one romaine heart for each salad. If that’s too much lettuce for you, or if you just prefer less lettuce, reduce the amount to a base that you’re comfortable with. I slivered cucumbers (skin on because it’s good for you) and avocados and added grape tomatoes (not necessary with the pico de gallo) to the salad tonight. I topped the salad based with black beans á la Tom, pico de gallo, and Mexi-Ranch dressing and added the seared tuna, sliced thin, and finished with a small amount of alfalfa sprouts.


There are three major mixtures at work on this salad: black beans á la Tom, pico de gallo, and Mexi-Ranch dressing. The recipes are as follows:


Black beans á la Tom (named for my dad who loves to doctor the beans)


1 can black beans, drained

2 Tsp ketchip

1 Tsp cumin

1 tsp minced garlic or garlic powder


Mix all ingredients and heat in the microwave for two minutes. Allow to cool one minute. I love this combination of flavors and use it for huevos rancheros, tons of salads, and as a dip unto itself with tortilla chips. If you don’t drain the beans, it can serve as quick black bean soup which is wonderful with a dollop of sour cream and sliced avocados on top.


Pico de gallo


1 to 2 slicing tomatoes, diced

1 small onion, diced

splash of lime juice

1/4 bunch chopped cilantro

1 jalapeño, diced (optional)

minced garlic

kosher salt


Mix all ingredients. Garlic and salt should be added to personal taste.


Mexi-Ranch dressing


Combine equal parts of your favorite Ranch dressing and your favorite salsa. Stir and smile at the lovely pink color.

Avocado and Mango Chutney/Salsa (Corey)

The title says chutney/salsa because they're pretty much the same thing, right? It all depends on what you do with it once you've made it. This recipe was invented to top fish (thus the chutney), but it's excellent with tortilla chips too (i.e. the salsa).

2 avocados
1 mango
1 bunch cilantro
lime juice
salt
pepper
minced garlic

Dice the avocados and mango into 1/4 to 1/2 inch pieces. Add about half a bunch of chopped cilantro (my mom doesn't remove the stems, but I do...it's up to you whether you want to take the extra time to pick all of the leaves off). Season with the juice of half a lime (or one to two tablespoons of bottled lime juice), salt, pepper, and a tablespoon of fresh minced garlic. Stir and enjoy.

I love to put this mixture on top of poached salmon, grilled tuna, and even fried tilapia...though I've also been known to eat it with chips or even just a spoon.

Monday, July 19, 2010

Soy-Ginger Marinade (Jen)


I often look to the internet when I need a recipe, but seldom find anything that I want to use without altering it. (So readers, feel free to mess about with our recipes!) This marinade is a good example. It had good bones (as my mom would say about structure in the garden) but needed some attention to detail—that is, the details about the way I like my food!

This is a wonderful marinade for tuna steaks or other very firm, dense fish. Try it with Corey’s Avocado and Mango chutney and a Caprese salad. Yum!

1 cup soy sauce

½ cup dry sherry

1/3 cup brown sugar (or if you like, try honey or real maple syrup)

3-4 tablespoons minced fresh ginger

4-5 large cloves of garlic, minced

Dash of lime juice

You can also add minced shallots or minced green onion

Mix everything together and taste it. Sweeten if the mixture is not sweet enough. It should taste fairly sweet but not sick-y sweet.

Wash tuna steaks and pat dry. Pour marinade over the fish and allow fish to marinate for at least 30 minutes. Grill fish over a medium hot grill or pan sear in a skillet over medium high heat. While the fish is cooking, reduce the marinade by pouring it into a small skillet and bringing it to a boil. Continue to boil until liquid has been reduced by at least half. Plate up the fish and pour a little over each piece.

Thursday, July 15, 2010

Whiteface Chicken Pizza (Corey)


I love pizza. The problem that I find with it most of the time is the red sauce...and don’t get me wrong, I love red sauce (with breadsticks and with meatballs on pasta). This recipe is pretty fluid (which, I think, most of our recipes are) so feel free to substitute as you so desire...this one can be as varied as you can imagine it. For today though, I’ll stick to what’s in the picture!


2 packages thin and crispy pizza crust mix (Jiffy, Martha White, or Great Value are all great) -- or your can make your own crust.


A note about pizza crust: I like to make my own. Sort of. I just don’t usually have time...so I buy the mix and mix it myself, and that counts, right? We used to make our own pizza crust from scratch, and it was super yummy but never as crunchy as I like it. So in the interest of time and crunch I buy the thin crust mix and doctor it up a bit. When it says to bake the crust before adding toppings, I always sprinkle on garlic, oregano, and basil to make it an herbed crust. I’ve also been known to add parmesan cheese on occasion. I love to use a pizza stone to make round pizza, but when I’m making half-and-half pizza for the masses, I’ll use a cookie sheet. That’s the thing about geometry...I was always better at dividing rectangles than circles.


Alfredo sauce (regular, mushroom, roasted red pepper, sub-dried tomato all good choices)

2 cups chopped cooked chicken (optional)

2 cups shredded mozzarella

1 1/2 cups raw French green beans OR 1 bunch green asparagus

1 pepper (green, yellow, orange, or red) julienned and chopped

2 cups baby portobello mushrooms, sliced

4 roma tomatoes, thinly sliced and patted dry

1/2 cup bleu or Gorgonzola cheese

garlic, oregano, basil


Mix your pizza crust (don’t forget the herbs!) and place in the oven following the directions on your selected brand (or your recipe). While it pre-bakes, chop your green beans or asparagus into 1 inch sections. Don’t forget to remove the hard ends of the asparagus. Place the vegetable of choice in a bowl with a quarter inch of water and sprinkle generously with kosher salt. Cook in the microwave for two minutes to blanch. They should still be crispy.


Once you’ve semi-baked your pizza crust, remove from the oven to begin assembly. Start with the sauce and apply in a thin layer. For a 16” pizza, I usually use less than half a jar of sauce. The key is that the sauce is just enough for moisture, but not the predominant flavor on the pizza. Top with all of the mozzarella cheese. Begin layering your vegetables. The tomatoes should go on last. Add your chicken (if desired) and bleu cheese. Sprinkle generously with oregano and basil.


Bake 9 to 11 minutes until the crust is golden brown and the bleu cheese has started to melt. Remove from oven and allow to cool 3 to 4 minutes before cutting into wedges.